• Home
  • About
  • Contact

Lauras Choice

A Blog from Laura Kubicki

  • Laura Kubicki Realty
  • Lifestyle
  • Food
  • Other

Easy Kiwi Berry Fruit Flowers

May 4, 2015 by Laura Kubicki Leave a Comment

Hey there!  Feeling Springy?  You already know how much I luv luv luv flowers.  Well,  I found a really cute food flower idea on Pinterest that I thought I might share with you because…

They’re Springy.

They’re Pretty.

They’re Tasty, Healthy, and Fun To Make!

How can you go wrong with that?

And they’re really so simple.  To be honest at first I wasn’t sure about the prep.  I’m not the world’s craftiest.  And if you’re like me I assure you they are easy peasy and you can of course do all different types of fruit this way – Cantaloupe, Watermelon, Honeydew, Apples, Pears, Mangos…what have you!

I call them Easy Kiwi Berry Fruit Flowers.  Aren’t they cute???

Easy Kiwi Berry Fruit Flowers

I used these with great success at my Mom’s recent Surprise 70th Birthday Bash.  They definitely created a “WOW” factor on the table with the other food and the guests and family just gobbled them up.

And as you might surmise, they’re not just for parties!!  My kids lllllllooooovvvvveeeee them too.  Check this out.

First you wash, dry, and peel the kiwi and berries.  Next you slice the kiwi (or your fruit of choice) and shape them with any cookie cutter shape you like.  (My mother-in-law gave me a bunch of vintage shape cutters ages ago and they were perfect for this – thanks Mom!)
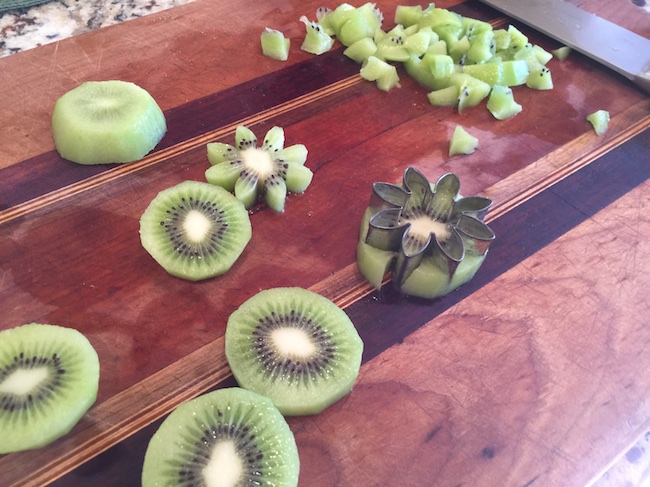
Shaping Fruit

Be sure to save fruit pieces you don’t use for these pretty babies.  Throw them in your salad that night, or add to any fruit salad ideas you have or you can do like me and…

Eat them!  

See those "scraps"?  Eat them!
See those “scraps”? Eat them!

Now once your berries are dry, grab a toothpick or skewer of your choice, stack the fruit, and hold together with said pick.  I liked the look of a couple different types of berries for plate presentation and the white platter really set them off.

Done!

Kiwi Fruit Flowers

Fruit Flowers Platter

There you have it.  Pretty little edible spring flowers.

Wonder what other shapes one could make?  Hmmm.  Makes a great kid/kitchen edible craft idea too!

Happy eating!  Hope you enjoy!


Filed Under: Featured, Food

Lemon Sesame Asparagus Stir-Fry

April 27, 2015 by Laura Kubicki 3 Comments

Hi Guys!

Guess what!  It’s PEAK Asparagus Season!  Yup.  Asparagus season starts in February and goes til June, but now in April is at its peak.

Which means it’s plentiful.  It’s delicious.  And you should be able to get it at a better price than usual!  Which makes it a terrific quick, healthy, side to a meal.  We eat it A LOT with grilled chicken, fish, steak…you name it.  And it’s a snap to prepare!
Speaking of snap…lets get started.

Start by simply ‘snapping’ off the tough bottom ends.  Some people cut it off, but it naturally snaps off right where it should, so do what you like there :o)!

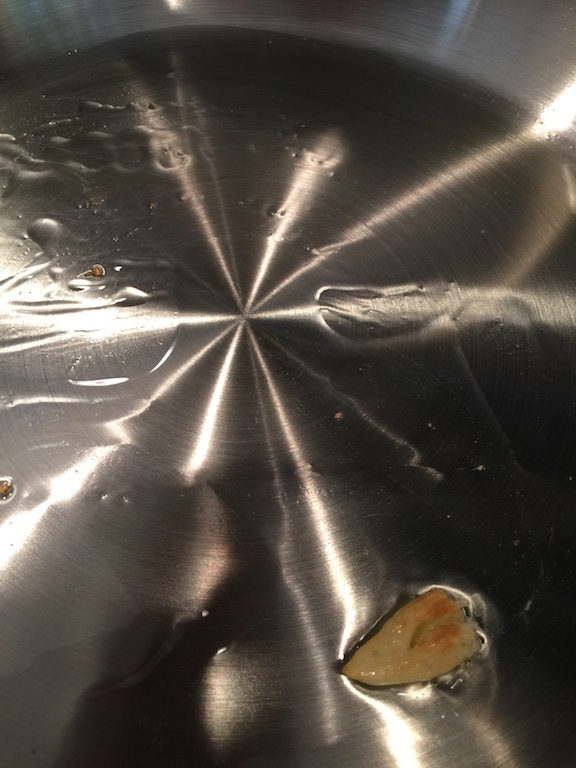
Next, add a TBS of oil (I use EVOO) to a large frying pan on Med/High heat and throw in a clove of slightly mashed garlic.  Cook the garlic clove (a minute or so) until it browns slightly and turns fragrant – then remove.

Garlic Infusion
Garlic Infusion

You can use chopped/minced garlic, but it’s tricky on higher heat and you know if garlic burns it gets bitter and then you have to throw the whole thing away…just seems easier to flavor the oil briefly for me, but you choose!

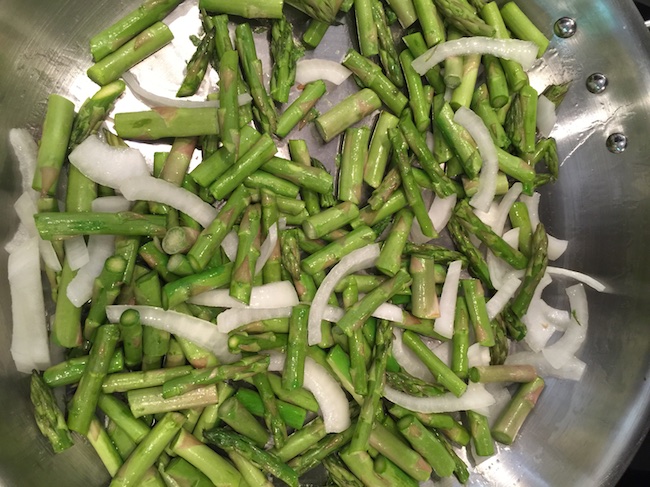
When the oil is infused, add your sliced onions and asparagus.

Asparagus 1

Stir fry for a minute or two until the onions begin to soften and the asparagus begins to turn a bright green.

This is the time to add your salt and pepper and sprinkle in your sesame seeds.

Add Sesame Seeds, Salt and Pepper

Toasted sesame seeds add a delightful layer of flavor to this dish, but if you’ve not the time, just throw them in regular like I did here and it’ll taste just mighty fine!  Stir-fry another minute or two and when they’re nearly done (that’s tender crisp for me) turn of the heat and drizzle in a tablespoon of fresh lemon juice and stir to coat.

Adding Lemon Juice
Adding Lemon Juice

And that’s it!  Pour into serving dish, add some lemon zest if you so desire and a slice or two for garnish and have at it!

This dish is so fresh and irresistible, I usually can’t help but to dig in immediately. Guests love it too, so it’s a great side to use when you entertain, and it’s so simple your kiddos can help with it!  This one’s a keeper – it’s sooo good!

Sesame Lemon Asparagus Stir Fry

So go ahead.  Dig in and make your mouth happy!!

Happy Asparagus Season friends – enjoy!


Lemon Sesame Asparagus Stir-Fry

From: lauraschoice.com
Prep Time: 5 Mins Cooking Time: 5 Mins Total Time: 10 Mins

Ingredients:

  • 1 TBS extra virgin olive oil
  • 1 slightly smashed garlic clove
  • 1/4 C sliced sweet onion
  • 1 bunch fresh asparagus
  • 1 TBS sesame seeds – toasted are marvelous
  • 1 TBS fresh lemon juice – or to taste 
  • Salt and pepper to taste

Directions:

  1. Heat 1 TBS of oil in a large frying pan over medium to medium/high heat
  2. Slightly smash 1 garlic clove and add to heated oil in pan.  Cook 1 minute or until slightly browned and soft.  Remove and discard.
  3. Slice asparagus and onions into one inch slices.  Add to infused garlic oil.
  4. Stir-fry 1 minute or until onions begin to soften and asparagus begins to turn bright green.
  5. Add sesame seeds and salt and pepper to taste.  Stir-fry another minute or two until just tender crisp.
  6. Turn off heat and drizzle lemon juice over asparagus.  Add to serving bowl and top with fresh lemon zest and slices if desired.

Filed Under: Featured, Food

Open Faced Refried Bean Sandwiches

March 10, 2015 by Laura Kubicki Leave a Comment

Open-Face-Refried-Bean-Sandwiches

Ok.  So you just had Burritos.  YUM!

Now what to do with the refried beans and filling leftovers…

Sure I could make another burrito… and what the heck would be wrong with that????

But…if you’re in the mood to try another fun, quick lunch idea with refried beans instead (and you’ll want to use up your beans quickly as you know they only last a day or two in the fridge before they really start to stink to high heaven), here’s a great option for you (and me :o)).  Refried Bean Sandwiches!!!

Open-Face-Refried-Bean-Sandwiches-Closeup

It’s so easy and gooey, warm and delicious, is a great protein source, is fun to eat, and is another surprisingly quick alternative to turkey and PB&J!  See what you think!  I’m pretty sure they’ll make you smile…

Open Faced Bean Sandwiches

From: Recipe Adapted from Beth Mochnick (thanks Mom!).

Ingredients:

  • Fat Free Refried Beans
  • 4 Slices of whole wheat bread, toasted
  • A sprinkle of shredded cheddar
  • A sprinkle of shredded lettuce (iceberg gives a great crunch, romaine or other leafy lettuces deliver better nutrition – take your pick!)
  • Finely diced fresh tomatoes (optional – I have a hard time eating anything without tomatoes…)
  • Dash hot sauce (also optional)

Directions:

  1. Toast bread slices.  Spread beans liberally (about 2 TBS) over toast.  
  2. Sprinkle with cheese and broil for 2 minutes or until cheese is melted and beans are warmed.  
  3. Remove promptly from broiler, place on serving plate, and sprinkle shredded lettuce to taste on top.  
  4. Serve with a side of fruit.  Hot sauce optional.

Filed Under: Featured, Food

Easy Bean Burritos

February 27, 2015 by Laura Kubicki Leave a Comment

Ok everyone.  Big day for Laura’s Choice.  Our first food video.

We wanted it to be quick and easy to follow.  We hope it is.  We happen to use this recipe all the time and the family LOVES it.  I love it because it’s so fast and easy – even easier than tacos.

So…here goes.  Let me know what you think.  If you notice something we could do better, let us know!  We’d love your help on this journey!!!

Easy Bean Burritos

From: Laura Kubicki: Adapted from Dee Mochnick, CA

Ingredients:

  • 1 package of whole wheat tortillas
  • 1 14.5oz can of fat free refried beans
  • Dash of hot sauce (optional)
  • 6oz grated cheddar (or so)
  • 1 C finely diced tomatoes (or chunky salsa)
  • 2 C finely shredded lettuce (I used Romaine)

Delicious additions if you have the time to get fancy

  • Seasoned ground turkey, chicken, or beef
  • Mexican rice
  • Sliced black olives
  • Diced sweet onions
  • Diced jalapeños
  • Corn
  • Chopped fresh cilantro
  • Diced avocado or guacamole
  • Salsa 
  • Sour Cream
  • Squeeze of lime juice

Directions:

  1. Spread refried beans on about half of a whole wheat tortilla.  Sprinkle with 1 TBS or so of cheese
  2. Put bean and cheese tortilla on top of a dampened paper towel on a plate.  Cover and microwave 30-45 seconds just until the beans are heated through and the cheese is melted
  3. Sprinkle with hot sauce (optional), lettuce, and tomato
  4. Roll into a burrito by folding the edge with the beans about a third of the way over.  Then fold up a portion of the bottom to make a pocket to hold the fillings inside.  Finish by rolling over once more and you’re done!
  5. Serve with extra salsa, hot sauce, sour cream if desired.  Other fun sides we use are corn chips or Mexican rice.  Enjoy!

Filed Under: Featured, Food Tagged With: Entrée, Mexican

Weeknight White Chicken Chili

January 30, 2015 by Laura Kubicki Leave a Comment

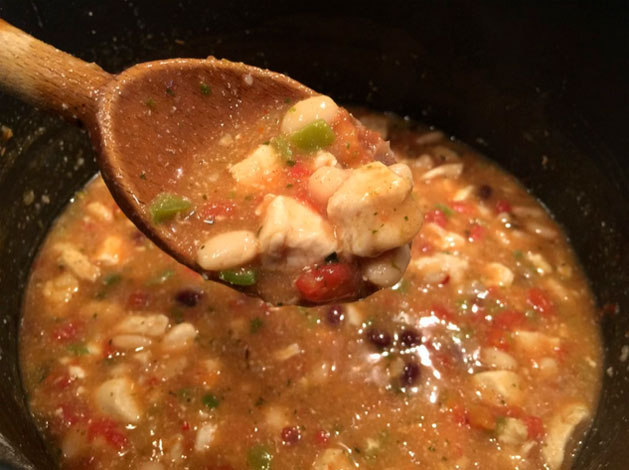
Weeknight White Chicken Chili Closeup
Weeknight White Chicken Chili

It’s still cold.

Anytime the temp dips below 40 degrees I get all shivery inside (I know this is a bit wimpy seeing as I lived in Rochester, NY for over 14 years). Regardless, when the temp dips this time of year, a piping hot bowl of ‘something’ usually hits my “what we’re having for dinner plan” pretty hard.

Enter – Weeknight White Chicken Chili.

Now notice I say weeknight.

Gotta be good.

Gotta be hot.

Gotta be fast.

See what you think of this…my fam loves it!

White Chicken Chili Served

 Ingredients

  • 1 TBS Olive Oil
  • 1/2 C Diced green pepper
  • 1/4 C Diced sweet onion
  • 2 lbs Chicken Tenders chopped into 1/2″ pieces (or any leftover or frozen rotisserie chicken you may have on hand)
  • 2 packs of White Chicken Chili Seasoning Mix ( I favor McCormick’s)
  • 2 cans 15.5 oz Great Northern Beans with juice (or any white beans you prefer)
  • 1 can 14.5 oz Petite Cut Diced Tomatoes (mostly drained)
  • 1 can 7.75 oz Black Beans (drained and rinsed)
  • 1 C good beer (you’ll be amazed at the depth of flavor this adds)
  • 1/2 tps chilis in adobo sauce (or to taste – adds great heat and smokey flavor)
  • Juice of 1 lime

Ideas & Additions!

  • Try serving over whole wheat elbow noodles for Chili Mac, or use any pasta you may have on hand.
  • Side suggestions:  Corn Chips, Corn Bread, or Saltines and a Garden or Green salad
  • Optional Toppings:  Low Fat Sour Cream or Plain Greek Yoghurt, Shredded Cheddar, Chopped Cilantro, Diced Avocado, Diced Sweet Onions, Lime wedges, Hot Sauce

Directions

  1. Heat oil in chili pot over medium heat.  Add peppers and onion and cook till soft.
  2. Add chopped chicken and cook till no longer pink.  Or if you’re adding leftover cooked chicken, just warm it up.
  3. Add white beans with juice, drained black beans and tomatoes, adobo sauce, beer, and seasoning mix.
  4. Bring to a boil, reduce heat to medium-low and simmer for 10-30 minutes (depending on how much time you have to let the flavors deepen).
  5. Stir in lime juice and serve with desired sides and toppings.  Add a splash of beer or water to desired consistency if you think it’s too thick!
  6. Enjoy!

Quick Tips!

  1. Dice up peppers and onions in advance and store in freezer.  Then just grab and cook for faster prep times!
  2. Save extra Chilis in Adobo sauce in freezer to use later.
  3. Shred cheese from a block and keep in freezer to save prep time and keep away from wood pulp included as a preservative in pre-shredded cheeses.
  4. Grind up lime rinds in garbage disposal to freshen sink


Filed Under: Featured, Food

  • « Previous Page
  • 1
  • 2
  • 3
  • 4
  • 5
  • Next Page »

Consider this…

"The future depends on what we do in the present" - Ghandi

Hi, I’m Laura

Hi! I’m Laura Kubicki. I’m a happy wife and mother of two boisterous boys. I'm also a licensed real estate broker, business owner, blogger, and photographer. Read More…

Connect with me

  • Email
  • Facebook
  • Instagram
  • Pinterest
  • Twitter
  • YouTube

Copyright © 2025 · Lifestyle Pro Theme on Genesis Framework · WordPress · Log in